"Giving up makes you angry."
Right! That's just it. Thanks, Peter.
Giving up makes me angry. So I refuse to do it. I have learned to 3D model.
Blender is free. It weighs in at 80MB of hard drive space. It is a fully functional, workstation-class 3D suite. It includes a Z-Brush style sculpting interface with full, pressure-sensitive artist tablet support. IK/FK bone systems, animation. Blender is only infrequently a compromise. Compared with 3DStudio Max, there are some things I wish I had. The biggest oversight, to me, is the lack of N-Gons. The community is large, and the last year has been spent in a push to consolidate the feature base, integrate new features, including a cleaner, friendlier workspace. The improvements are impressive.
Did I mention Blender is a professional, workstation-class 3D suite? Just download it. http://www.blender.org
Don't worry about hardware. I do all of my work on a 2-year old Mac Mini.
If you have tried Blender in the past, it is not the same application you used. I began with version 2.49b, less than a year ago. The current version is simply a different program.
The next thing to do is watch tutorial videos. Do not attempt to use the online manual, or you will lose your mind. You have been warned.
In addition, I found this thread at Polycount (about Subdivision modeling) to be a self-contained course in 3D modeling in general.
Andrew Price Tutorials
{Blender Guru website}
Andrew Price taught me to 3D model. He is funny. He works quickly and efficiently. His work is professional. The final renders for most of his tutorials look like photographs. He opens each video with a screenshot of the scene to be built, talks about it, and then does something wonderful. He closes the final project, opens a brand new, empty scene, and builds it again.
And at the end of a one-hour video, although it may take me six hours to complete, I have built the same scene. He covers all aspects of the 3D process: modeling, lighting, textures and materials, rendering, compositing; rigging, animation, simulations.
I do not know how to thank you enough, Mr. Andrew Price.
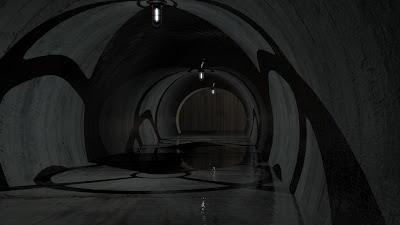
I. Subway Tunnel
Giving up makes me angry. So I refuse to do it. I have learned to 3D model.
Blender
I don't steal software. It shouldn't have to be said, but it does.
3D Studio is a $3000 application.
Did I mention Blender is a professional, workstation-class 3D suite? Just download it. http://www.blender.org
Don't worry about hardware. I do all of my work on a 2-year old Mac Mini.
If you have tried Blender in the past, it is not the same application you used. I began with version 2.49b, less than a year ago. The current version is simply a different program.
The next thing to do is watch tutorial videos. Do not attempt to use the online manual, or you will lose your mind. You have been warned.
In addition, I found this thread at Polycount (about Subdivision modeling) to be a self-contained course in 3D modeling in general.
Andrew Price Tutorials
{Blender Guru website}
Andrew Price taught me to 3D model. He is funny. He works quickly and efficiently. His work is professional. The final renders for most of his tutorials look like photographs. He opens each video with a screenshot of the scene to be built, talks about it, and then does something wonderful. He closes the final project, opens a brand new, empty scene, and builds it again.
And at the end of a one-hour video, although it may take me six hours to complete, I have built the same scene. He covers all aspects of the 3D process: modeling, lighting, textures and materials, rendering, compositing; rigging, animation, simulations.
I do not know how to thank you enough, Mr. Andrew Price.
I. Subway Tunnel
Final Render, Composited
I learned a lot about modeling and modifiers from the Subway scene. He works very quickly, making efficient use of arrays and paths. Vague outlines of objects become the correct shape like magic, with a SubD modifier. There will be a train in the heart of the Asteroid, but I still needed to adapt the scene a bit...
 I have only made a few changes. My goal was to prepare the assets for a game engine. Utility tunnel systems will ramify throughout the Asteroid Museum, and I sought an aesthetic which would translate well to a game engine. in this case, a design where unnatural, hard shadows are an integral and descriptive part of the world. The reflections still have to go, but mostly I need the sheen, and a sliver of light, which can be faked in the floor material. The important issue here is that these lights can be dynamic, without compromising the lighting quality. The geometry is extremely simple, and enclosed, allowing more complex and dynamic lights.
II. Asteroid
As time passes, the rocks fly past the camera. I have not rendered an animation, but it is as simple as pushing a button. The dispersion camera effect is done after the scene is rendered, in the Compositor.
III. Bullets!
Final Render - Composited
Another astonishingly easy, eye-opening tutorial. This is all texturing. And the textures are not from bullets. A grungy wall texture, some dirty concrete, and an image of deep scratches in some uknown material. The actual modeling of the bullet takes 2 minutes. The camera effects are all done in the compositing stage.
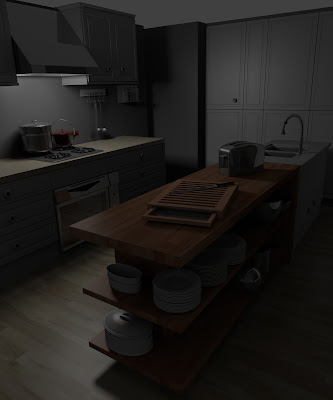
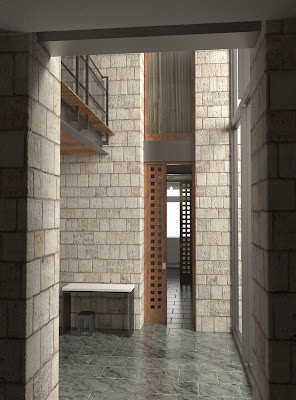
IV. Architecture - Modern Korean Kitchen:
 Here, I have done a lot of my own work. I made my own toaster, knife, utensils, bottles, oven, which are not covered in the tutorial. The red pot, and the cute little Sorapot below are both from scratch, from reference images. For a game environment, I modeled the inside of cabinets and drawers so they can be opened. I also added surrounding hallways and rooms, a window. This room will live in a full house, in the game world.
 The tutorial moves on to a physically-based renderer. All the materials are simple, and rely upon accurate lighting and reflection. None of this will do for a game engine, so I stuck with Blender's internal renderer, and changed the setting. In the following images, I am weaning myself off reflections, and toward soft, white moonlight and specular highlights.
What to do about reflections? ...Soft moonlight to the rescue!
I have not completed the transition, but I think the approach is clear.
IV. Realistic Earth
Sometimes you just have to be done. I am used to freely manipulating shader nodes in UDK, and I kept trying things Blender's aging (and now replaced) renderer was not equipped to do.
So I'm done. I will work out an approach to 3D starscapes when I finish modeling Saturn's Ice Queen moon, Helene. The Cassini Orbiter's public image library is now sufficient to construct a full, 3 dimensional model. Incredible.
V. Fluid Simulation
Meet Blender's new render engine, Cycles:
Now, these are meshes. The water is a fluid simulation/animation, stopped at a particular frame, and rendered. It is a series of solid objects. Andrew has a clever approach to modeling ice cubes.
VI. Rendering with Cycles
 The tutorial is an introduction to lighting and materials with Blender's new render engine, Cycles. He spends no time on modeling; this is the only time I have used the reference meshes, which weigh in at a total of just over 1600 vertices. Tiny.
To me, this scene is an advertisement for Cycles. I don't have the hardware to explore Cycles in depth, and time spent this way is of little practical value for game engines.
I have three uses for such work. First, the more I know about real lighting, the better I can manipulate shader code to fake it. Physically accurate render engines are that good. I can ask it questions about light, and it will show me answers.
Second, I will be ferrying light from place to place in the Asteroid using natural and artificial prisms and vault lights, liquids, scattering over distances and through different media. I can build concept art in Cycles to help guide me, and test the physical behaviors to construct the materials and scenes.
Third, Cycles allows direct manipulation of node-based shader materials, in a physically accurate environment. This is an excellent way to learn about the capabilities of graphics hardware and languages.
More to come...


Ryan, I am really impressed with your modeling. I have a little bit of understanding about how difficult and intricate this kind of work is.
ReplyDelete